Dissonance is when two notes clash.  Harmony is boring.
View All >>

A tip from my notebooks.

Typically you want to have small Docker images, to save cost on both storage space in the container registry and the production machines. One trick to get a smaller image than usual is to copy your artifacts using a multi-stage build. The first stage installs the needed tools to build, and the second stage only contains the results.

I've found that apt-get update can otherwise really bloat the image by itself. Even with commands like apt-get clean and rm -rf /var/lib/apt/lists/*, the image was still bloated.

Here's an example of using the multi-stage technique, from one of my projects. base builds and tests the project, and prod copies just the artifacts from that image.

FROM ubuntu:24.10 as base
WORKDIR /app/

RUN apt-get update && apt-get install -y \
    golang ca-certificates python3 python3-yaml

COPY . /app/

RUN go generate ./src/... && go build ./src/main && go test ./...

#-----------------------------------------------------------------------------------------
FROM ubuntu:24.10 as prod
WORKDIR /app/

COPY --from=base /app/main /app/LICENSE.txt /app/
CMD ["./main"]

Honestly, just don't do it. If there's one thing that ChatGPT is bad at, it's answering obscure NestJS questions. If there is another thing it's bad at, it's telling me no when something should not be possible.

Instead, what it does is yank me around with hope while giving me convincing looking code that doesn't quite work.

So, here's what I wanted to do. I'm creating task classes like these:

@DefineTask("Test Task")
export class TestTask implements TaskClass {
   constructor(
      // (insert other services from the container here)
      private readonly host: TaskHost,
   ) {
   }

   async execute(): Promise<boolean> {
      ...
   }
}

I wanted all of my program's tasks to implement this interface, where the "task host" contains the details of the task at hand in addition to utility functions like audit logging that the task can use while executing.

The thing is, the task host is built by the parent service at the time of instantiation.

Naive me figured that it would be no big deal to pass that along to moduleRef.create somehow when instantiating the task class. I thought it would be easy to mix that with the other constructor arguments that come from the container. The short answer is no, it's not possible. NestJS doesn't provide any way to do it. ChatGPT may tell you otherwise, since it's terrible at saying no, so I wasted a good amount of time trying to make it work with research about "context IDs" and such.

The real solution is to not use custom constructor arguments, and instead receive the data through another interface function, e.g., the execute function in this case.

async execute(host: TaskHost): Promise<boolean>;

But what if?

Curious me wanted to make it work anyway. Not because I really needed to use custom constructor arguments in my tasks, but because I wanted to know how it all works under the hood.

To start, the key here is TypeScript. Javascript by itself doesn't have information about how classes are constructed. In other words, Javascript doesn't have reflection. It's TypeScript magic that introduces some reflection concepts and allows NestJS to know how to instantiate objects.

It starts with two cryptic configuration values in the tsconfig.json file:

{
   "experimentalDecorators": true,
   "emitDecoratorMetadata": true
}

The experimentalDecorators enables decorators in the code, the syntax of @Xyz(...) that you can attach to classes and properties and such. emitDecoratorMetadata causes all decorators to add reflection metadata to their targets, available at runtime.

So for example, when you have:

@MyDecorator()
class MyClass {
   ...
}

TypeScript by itself will see that this is a "decorated" class. For any decorated class, it will save some "design" metadata about it. The most useful one is design:paramtypes which dictates what the construction parameter types are. It's a simple array of types, e.g., [string, number, MyService] etc., corresponding to each constructor argument. It doesn't matter what the decorator actually does, any decorator use will cause this design metadata to be emitted (so long as it's enabled in tsconfig).

If Typescript didn't have the design metadata feature, then you would have to decorate each injection manually, always, as there would otherwise be no way for NestJS to determine what to inject. For example:

constructor(
   @Inject(MyServiceA) private readonly serviceA: MyServiceA,
   @Inject(MyServiceB) private readonly serviceB: MyServiceB,
   @Inject(MyServiceC) private readonly serviceC: MyServiceC,
)

Versus when you have design metadata to assist with determining what to inject:

constructor(
   private readonly serviceA: MyServiceA,
   private readonly serviceB: MyServiceB,
   private readonly serviceC: MyServiceC,
)

Much more convenient, even if we are breaking the SOLID principles by depending on a concrete class.

Okay, so back to the goal at hand, getting custom constructor arguments into the instantiation process. Once you understand the design metadata, the solution becomes clearer.

The idea is to inspect the construction metadata and then copy it to a separate factory class. That way, you can intercept the injected arguments, add your own, and then forward the complete list of arguments to the actual class constructor.

Just one more thing, NestJS will complain that it can't resolve your arbitrary constructor argument.

Revert to the task class example:

constructor(
   private readonly myService: MyService, // Injected from the container
   private readonly host: TaskHost, // Injected manually
)

NestJS will complain that it can't resolve TaskHost since it's not defined as a provider. My solution is to have a custom decorator for those arguments:

constructor(
   private readonly myService: MyService, // Injected from the container
   @Supplied("host") private readonly host: TaskHost, // Injected manually
)

What @Supplied would do is similar to @Inject. It updates the metadata to describe that the parameter would be supplied by data from the user under the key "host". It also calls @Inject using a dummy token SUPPLIED_DEP to resolve the NestJS error.

export const SUPPLIED_DEP = Symbol("supplied-dep");
export const SuppliedDepProvider = {
   provide: SUPPLIED_DEP,
   useValue: undefined,
};

With this as a provider, NestJS will use undefined as the value for any "Supplied" parameter, and then it's up to our factory function to fill in the blank. Alternatively, you could remove the custom arguments from the factory's constructor, but that would involve modifying the undocumented metadata which would hurt forward compatibility, not to mention more complex.

The factory function reads the metadata that describes the supplied parameters and understands which arguments to replace with data from the user, and then forwards the updated argument list to the real constructor.

See my working example of the hybrid creation process.

The danger I see with this approach is that we're touching internal reflection data that is not well documented. For example, the SELF_DECLARED_DEPS_METADATA metadata from NestJS is copied. This is what contains the @Inject decorations. There might be other reflection fields that I'm not aware of that are not being handled properly here, and if anything underneath changes, the code would break. Hence, this is more of a learning exercise than a recommended approach.

I wrote about this a little before, but I've touched upon it recently again in smaller projects. I'm a bit wary of introducing experimental patterns in larger projects, but my smaller personal projects are great testing grounds.

I was writing some code that did a lot of file I/O. The thing about file I/O is that there are errors being returned everywhere. Most if not all of these errors we don't care about. When they occur, we just give up and return them. Pass them onto the user - the user has to do something to fix it, like correct the file path or replace their hard drive.

I reduced my code by 25% (yes, that many err != nil checks) by wrapping the I/O functionality to use panic. Normally I'd have a shared panic handler at the request level in my microservices, but in this case, I was writing a library. I don't think it's ever okay for a library to panic. So what do we do?

Simple, catch the panic before returning from any exported function. Any exported function that can error looks like this:

func Foo() error {
   return errorcat.Guard(func(cat errorcat.Context) error {
   
      // Do the work
   
      return nil
   })
}

The Guard function wraps the call in a panic recovery process. And then you make other wrappers like so:

// Binary write
func bwrite(cat errorcat.Context, w io.Writer, data any) {
   cat.Catch(binary.Write(w, binary.LittleEndian, data))
}

Then your code looks like this:

func (source *Source) Export(w io.WriteSeeker, dataOnly bool) error {
   return errorcat.Guard(func(cat errorcat.Context) error {
   
      if !dataOnly {
         bwrite(cat, w, uint16(len(source.Data)))
         bwrite(cat, w, uint16(source.Loop))
      }
      
      bwrite(cat, w, source.Data)
      
      if !dataOnly {
         if len(source.Data)&1 != 0 {
            bwrite(cat, w, uint8(0))
         }
      }
      
      return nil
   })
}

Instead of this:

func (source *Source) Export(w io.WriteSeeker, dataOnly bool) error {
   
   if !dataOnly {
      if err := bwrite(w, uint16(len(source.Data))); err != nil {
         return err
      }
   
      if err := bwrite(w, uint16(source.Loop)); err != nil {
         return err
      }
   }
 
   if err := bwrite(w, source.Data); err != nil {
      return err
   }
 
   if !dataOnly {
      if len(source.Data)&1 != 0 {
         if err := bwrite(w, uint8(0)); err != nil {
            return err
         }
      }
   }
 
   return nil
}

All that err checking does is add needless noise. I/O errors are hardly ever recoverable. And worse, you can forget to check an error, and have it silently cause havoc and lead towards the billion dollar mistake. Out of the box, Go won't warn you if you ignore a return value.

The error-panic pattern also catches actual, real panics. So if you do something stupid like read past the end of a slice, it will turn that into an error, and the consumer can benefit from an additional safety net. Basically, your library will never panic past that barrier.

The guard context is a newer concept of mine. Basically, it helps you to track what functions can actually panic. That way, when writing a library, you never forget to have a recovery context for functions that can fail with the panic pattern. Otherwise, you might be tempted to wrap everything that is exported, just to be safe, when you don't need the guard in many cases. When the context is a required parameter for any function that can throw panics, then it becomes impossible to panic without the guard already in place.

See Errorcat on GitHub for a packaged implementation of the pattern. The README also details other advantages with the pattern.

It's also neat to note that, while many Go programmers may detest this usage of panic for error handling, the pattern is actually described in Defer, Panic, and Recover from 2010 on the Go Blog, which points out that the standard library uses the same pattern to condense tedious error handling in certain packages.

A snippet from the json encoder, for example, does not have an error return, and uses the passed in state to bubble errors upward via the "error" function:

func (bits floatEncoder) encode(e *encodeState, v reflect.Value, opts encOpts) {
	f := v.Float()
	if math.IsInf(f, 0) || math.IsNaN(f) {
		e.error(&UnsupportedValueError{v, strconv.FormatFloat(f, 'g', -1, int(bits))})
	}
   ...

The panic is captured later and translated into an error response.

Overall, I think having error as a normal return value was a mistake in the design. Now we have so much code based on that practice, and Go 1.x needs to be backward compatible with all of Go code. What I think would be great is some syntactic sugar for bubbling errors. I saw that the Go team is currently discussing a proposal on reducing error boilerplate. It suggests this Rust-like syntax, among other conveniences:

bwrite(w, uint8(0)) ?

For this example, if an error is returned from bwrite, then the "?" at the end would cause the function to return the error at that point. Any other return values would be filled with defaults, exactly the same as your typical if err != nil check with a return. The proposal also covers optional error blocks, executed when an error is present. Hopefully we'll get some new nice things like this soon!

I was cleaning up my GitHub account recently. I've just hit 100 repositories, and some cleanup was well overdue. For the past week or so I dug through my old Super Nintendo sources including my SNESKIT SDK.

Such a rabbit hole! I decided to rewrite some of the tools in Go while better documenting them.

snesbrr - A BRR codec

This tool has some history. DMV47, a hero of yore, had written a tool to convert between wav and brr. I also had an "improved" version of his code contained in my snesmod converter. However, both versions shared one thing in common: they were unreadable. Tons of little variable abbreviations scattered about with no obvious purpose.

A good senior software engineer wouldn't touch it. If it works it works. However, when I'm working on personal projects, I don't take the "good engineer" role. I take the naive, curious, and enthusiastic programmer role. Ugly code had to go! A couple days later I had a Go port of the code.

To test and make sure it worked, I compared output between the original snesbrr.exe and my new code. Painstakingly I was able to align the outputs. At first I tried to get AI to port the C++ code to Go, but it kept messing up on all of the inane casting rules C++ has (and there were a lot of casts going on).

Okay, so I had a direct port of the codec, but then I wanted to take it a step further - rewrite it. The original codec was still difficult to read. The Go port mimicked much of the original C++ and was equally ugly, peppered with vague variables. Also, I spotted a few curious bugs here and there. I think my C++ copy of the code in smconv fixed those bugs, but I have no recollection of what I really did for the original smconv.

My newer version was based off of the information provided by in Fullsnes. This treasure trove of information wasn't written until years after my original iteration. All glories to Martin Korth and his continued dedication to documenting retro consoles.

Testing was a little more difficult the second time around given I didn't have an exact reference to work with. Codecs are tricky to test, especially if they are lossy, but I managed to make some decent cases.

modlib - A tracker module loader

The overall goal here is to replace the components smconv used with reusable libraries. The second main component was loading IT files. I extracted the functionality here and ported it to Go under a new package modlib.

Over time I hope this package grows to support other formats. It has two subpackages for now, one is a "common" module definition which should support all formats it can load. The other is a direct interface to the Impulse Tracker file structure. One additional improvement I made was supporting the IT sample compression which was missing for the past forever in smconv.

smconv - The SNESMOD music converter

With the last two main components out of the way, this was more achievable, a Go port of my converter. For this final smconv package, the work left was conversion from the common module format into the special SNESMOD format. Thankfully, past me wrote doc/soundbank.txt which was extremely helpful in deciphering the old C++ code.

The only other headache was SPC generation and figuring out how to compile the SPC driver and monkey patch it for the SPC code. The old C++ was a great frame of reference, albeit a little cryptic. Funny how we can completely forget about the internals of systems that we've worked with long ago. Looking at the assembly code of the SPC driver today leaves me in awe.

Cross-platform

Makefiles! Makefiles everywhere. Back in my day I was a Windows user. I still am, but today I put more care into our non-Windows users (especially CI systems). Makefiles are fun to write either way, and I could use more practice with them. I've littered each project with make rules to build out of the box. I put a lot more emphasis on the compilation process these days, given how many struggles I've endured in the past over poorly constructed projects.

One of the reasons I wanted to port the tools to Go is just because of how easy it is to build everywhere. Compiling C++ on Windows and installing MS tools always feels a bit rough. Surely it's better today, but I've had a bad taste left in my mouth from C++ tools.

Some other smaller programs I've also converted to Python for the same reason. Python is my go-to when I want to write a quick tool that can run anywhere.

pmage - An image converter

Okay, so I still wanted to build my example programs out of the box. One last ugly thing was snesgrit. This was a (poorly) modified version of grit with support for the SNES. It worked great back in the day, but I don't like the idea of maintaining a fork of grit.

If I wanted to keep this path of maintaining snesgrit, I'd look for a way to cleanly merge the code into the main repo, to add SNES support with an option. However, after a look at the code, that seems easier said than done, e.g., I saw bit mappings that matched the GBA/NDS bits in headers as opposed to the SNES mappings.

So I decided to write a new tool. Why not? (I mean, I could give you a hundred reasons why not...) I could learn more about Go's image libraries. The goal for this tool would be a conversion process that is easy to understand. Each image file is given a YAML file that describes how to convert it.

The complexity shoots up when you want to support different systems while keeping the conversion rules general between them. My approach is to have a system "profile" that determines specific mappings or formats, and then that is mixed with the per-image metadata to determine the final output.

It's in a very rudimentary stage right now, but hopefully I'll have time to expand it later.

If you're curious about the name, it's "picture mage", i.e., "picture wizard". Primarily a reference to Final Fantasy which also conveniently sounds similar to "image".

Contributions welcome!

I'm not sure how much more I'll add to these over time. This was more of an effort to document the existing work than anything. I also see there is another great collection of tools with pvsneslib, which I would recommend checking out if you're getting into SNES development.

In the end, I'd hope my projects are contributor-friendly, hence my cleanup here. Contributions are always welcome. I think the SNES scene has always struggled a bit, given its difficulty to work with, but it's great to see that people are still having fun with the system. If you find anything difficult to understand in my codebases, feel free to open an issue and we can clarify it.

My Fake Wall

Step into my home office. Have a look around. Vibrant, modern, and you'd never really suspect a thing, would you? This is what my clients see.

Picture of my office from webcam

But the wall is actually only as tall as my webcam's line of sight, and it's on wheels.

Picture revealing the fakeness of the wall on wheels

This was a fun project of mine back in early 2022. I was feeling that my old backdrop was a little too bland, and plus, it'd flutter when even the slightest gust came in, no matter how tight I tried to clamp it.

A white sheet on a frame for a backdrop, when I have a background in construction?? Surely I could do better.

My old backdrop, a sheet on a frame

I did a little digging around first for inspiration. I came across this video from DIY creators showing the recipe which I fell in love with instantly. After leaving a small donation for their channel, I got to work.

Planning out the sizes on a tablet

I don't have any power-tools of my own, but my dad was busy with a project not too far away. Free workshop and tools!

Truck at the workshop Lumber at the workshop

No, all that lumber wasn't needed. That was already there when I arrived. I just had a simple frame to make out of 2x3's and a few sheets of 1/4" plywood. Doesn't take much time at all if you're used to framing. A curious guy at Home Depot asked what I was building. A few sheets of plywood and wood? Should be obvious. It's a wall!

Cutting wood to length

Framing the wood Framing the wood more Framing the wood even more The plywood on top Finished frame

Hefting it home was a bit of an ordeal – a couple of spare boards make for good handles. Then I had to attach the wheels. Not so easy without any extra hands, using counterweights to keep it from falling over. That pipe clamp isn't just holding the level – it's keeping it leaning on the wheel bracket. 😃

The frame at home Prepping to add wheels Plumb with pipe clamp and level Showing one side of the frame Showing other side of the frame Showing bolted down wheels

Now we're ready to paint – or prep for painting. It's not a typical wall with sheetrock. It's just a thin cover of 1/4" plywood. First I needed to apply some wood filler to cover any dents, nail holes, and the long plywood seam.

I made sure to keep the seam near the bottom of the surface, figuring that would inevitably add some unwanted texture.

Applying wood filler Applying more wood filler

It was easy enough to wheel outside for sanding. Surprisingly light and mobile for how unwieldy it was to carry home.

Sanding the wood

Then it was ready for some priming – at midnight. The project was completed over one weekend, with day one building it, night one priming, and then it'd be dry and ready for paint the next day. Priming and painting inside wasn't the most delightful experience with the fumes and all, but I didn't want to risk the weather getting to it while it's vulnerable.

Painting primer Done with primer

Now it's ready for paint the next morning. It's got two sides, too, so if I ever want another design or color, I can do the other side, and then reverse the wall on a whim.

Ready for paint

I pulled some strings to lay out a design. My sister has an eye for designing neat and modern things and helped me come up with it. She also helped pick the colors. If I did this again, I'd use two coats of paint. Home Depot lets you order cheap, small 8oz samplers that were perfect for one coat.

Pulling strings for tape Strings intersecting The colors used Painting the wall Painting the wall more

After the first color, I let it dry to touch, and then tape could mark the next section with clean lines. It was a little worrying working with tape under such a short timeframe, but it turned out great. I could paint all of the colors in a single day with time for each to dry.

Marking the next sections Tape and paint Peeling tape away

Ready for the final sections on the left and right. If you look very closely you can see a little color bleed on the edge between sections, but it's not very visible, especially not from a webcam.

Final sections Final sections taped Final sections painted Completed painting Completed painting

Very cool. Very fun, and you can't see any bleeding on the edges between colors, right? Now I could wheel it into my office.

The wall in the office bare of decoration

My sister picked out some shelves and a clock. I'm fairly decorignorant. After plotting out a general idea on paper, I used OBS Studio to view my webcam with a rule-of-thirds overlay, so I could see from a customer's perspective and align things according to the plan.

Shelves not mounted yet Positioning the clock Positioning a shelf Final composition Another shot of final decorations

I really love the result. My manager commented on the clock, joking about how it proves I'm not faking my timecard snapshots. Part of the inspiration to build this was for my timecard snapshots that were taken every ten minutes. While most contractors didn't care how they looked while working remotely, I had a lot of fun with it.

The clock also helps a lot to show clients what time it is for me, so they know to say good morning or good afternoon. 😊 I used to have a clock overlay via OBS Virtual Camera, but that was causing some conflicts with our work tracker app.

The only gripe I had was the lighting – the shadow is too deep against the shelves and the clock. If I wanted to go the extra mile, I'd set up more deliberate lights instead of using the overhead ones.

My clean office

Fun stuff! Many other colleagues would avoid turning on their webcam in customer calls since it's easy to not look great while working remotely, but having a decent presentation contributes a lot towards customer engagement and loyalty. It really eases communication barriers. People like to comment on the GameBoy in the background – a throwback to my history with Nintendo consoles.

The backdrop is still behind me today and serves me well. I also like to see when clients do something with their presentation beyond the common blurred background. One of my clients even had a virtual avatar which I thought was amusing, but it wasn't because they were shy. It was because they worked for an organization with top-secret security and couldn't share any of their identity!

Meeting with clients

Got a neat remote office to share? Let me know!

Blog Index >>

Picture of me

Venice, Italy

Hey there! I'm Mukunda Johnson, a seasoned self-taught developer. None of what I know today was ordered through a university or CS class. Programming is just something I've always enjoyed.

Oddly enough, my interests are pretty bizarre to my family. I was home-schooled, and my family's trade is construction work; my youth involved a lot of that. I've built two houses from the grass up, living in the second one for the past several years.

Despite the disconnection, I've spent nearly my entire life toying with computers. I have an extensive history in fun projects. I say self-taught, but I wouldn't discredit all of the amazing people in the developer community that have contributed to my knowledge over the last 25 years.

For my professional life in tech, I've worked with many clients, from individuals to small businesses to enterprises; a lot of remote work recently, with the last role being with Crossover. I've grown very competent with a broad range of technologies. I enjoy working with clients to reach practical solutions, and they usually appreciate the thorough and proactive approach I take to consulting.

If you're curious about my name's origin, it's inspired from ISKCON culture, a branch of Hinduism that sprouted in New York in the 60s. The translation of Mukunda is giver of liberation, and my middle name is Das, which indicates I'm the servant to the giver of liberation (God). I'm very open-minded and avoid religious comparisons or conversation for the most part, but some core values of ISKCON are vegetarianism, sobriety, and ethical living.

For fun, if I'm not working on some odd project like this landing page, I may be playing World of Warcraft. I enjoy raid-leading and performing with the top 0.5% of players worldwide. It helps keep the brain refreshed. Most of my friends who I relate with have been "online," and that trend still continues. Other things I enjoy are writing, travel (when money and inspiration permits), and keeping fit. I've made it more of a priority recently to stay healthy.

A handful of neat endeavors of mine. Much of my professional work is proprietary and/or can't be shared, so these are mostly personal projects. See my GitHub for additional projects or source code.

#golang #typescript #react
2025
thumbnailA fun collaborative canvas with infinite resolution. Not finished yet.
#golang #k8s #typescript #react #nestjs #chrome
2024
thumbnailA SaaS application. Golang container backend. React/Typescript client and Chrome extension. NestJS SaaS/infrastructure management backend. Still growing.
#golang #typescript #react
2023
thumbnailAn anonymous chat server. It's a rite of passage for a programmer to write a chat server.
#csharp
2022
thumbnail
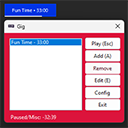
A handy personal tool to track time spent on tasks to chart in a CSV later. I wrote this when I needed to better manage my time in a flexible role and manage SLAs; also to practice C#.
#python #openvpn
2021
thumbnailHonestly I don't remember much about this. I wanted to simplify creating openvpn profiles, and openssl is a very deep rabbit hole. Here's a blog article.
#python #email
2021
thumbnail
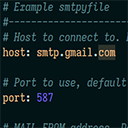
This is a tool I made to simplify reproduction of issues with email networking. A smtpyfile contains delivery parameters and email content, basically a test case for your engineering team.
#javascript #glsl #html
2020
thumbnailThis is a WebGL application I made to demonstrate expertise in web development while also showing my hobbyist projects. It uses no libraries and is written from scratch.
#javascript
2020
thumbnailAn implementation of Conway's Game of Life.
#sourcemod
2014
thumbnailA tetris game that runs inside of Counter-Strike or other Source games. Featured on Kotaku.
#sourcemod
2013
thumbnailA Mario game that runs inside of Counter-Strike or other Source games. Featured on PC Gamer. Extremely cool how this works internally - a completely server-side hosted game-within-a-game that had no intention of supporting such a thing. Smooth side-scrolling and all!
#assembly #nes #c
2009
thumbnailA ridiculously fun project that mixes PCM via carefully crafted code. The CPU cycles were hand-counted to time the output of each sample. The sequencer also supports other NES audio channels and extension chips.
#assembly #snes
2009
thumbnailProgramming the SNES by yourself is not for the faint of heart. It was no wonder that the active developer community for this console could be counted on one hand. This was a fun project, complete with audio support from my snesmod library. Music is from various friends in #mod_shrine EsperNet. This game is published via the Super 4 in 1 Multicart.
#assembly #snes #c++
2009
thumbnailThis is a premium SNES audio library that supports streaming audio from the SNES processor to the SPC coprocessor while playing rich Impulse Tracker music. Only a few commercial SNES games like Star Ocean have that functionality.
#c #gba
2008
thumbnail
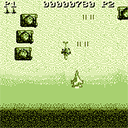
A fun GameBoy® Advance game.
#arm-assembly #gba #nds
2008
thumbnailA comprehensive audio engine for the GameBoy® Advance and Nintendo DS. It supports several tracker music formats and software mixing. It can extend the Nintendo® DS's 16 audio channels with additional software channels. Written entirely in ARM assembly.

You can visit my old projects page that contains some other fun things. My Hobbyist Portfolio also shows many of my old projects.

Have a virtual business card. 🤝

QR Code for mukunda.com
Development • Consulting • Freelancing
Mukunda Johnson
Software Engineer

Resume and references are available on request only.

Find me on: LinkedIn | Twitter/X | GitHub